
Here’s a simple, step-by-step guide to take a geo-tagged photo (photo with GPS location, date & time) using your mobile phone and a GPS Camera app.
What is a Geo-Tagged Photo?
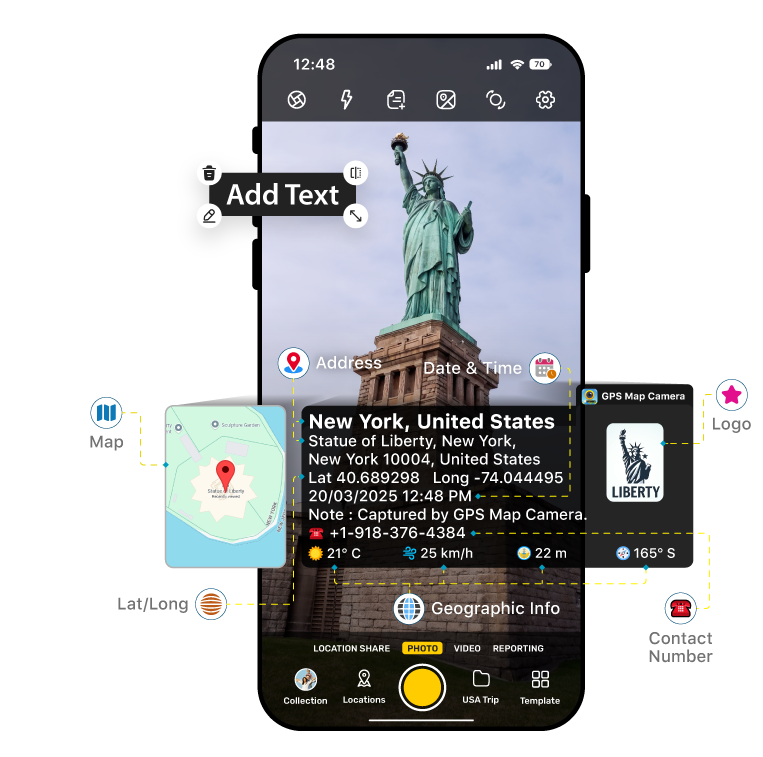
A geo-tagged photo contains:
📌 Latitude & Longitude
📍 Place name / Address
🕒 Date & Time
🧭 GPS coordinates embedded on the photo
These are commonly required for school records, government work, surveys, inspections, and projects.
📱 Method: Using GPS Camera App (Android)
🔹 Step 1: Install GPS Camera App
From Google Play Store, install:
GPS Map Camera
GPS Camera – Location on Photo
(Any similar GPS Camera app will work)
🔹 Step 2: Turn ON Location (GPS)
- Open Settings
- Go to Location
- Turn ON
- Set mode to High Accuracy
🔹 Step 3: Open GPS Camera App
Allow Location, Camera, and Storage permissions
Wait a few seconds until GPS signal is fixed
🔹 Step 4: Adjust Settings (Optional)
Inside the app settings, you can enable:
✅ Latitude & Longitude
✅ Address / Place name
✅ Date & Time
✅ Map view
✅ Custom text (School name / Project name)
🔹 Step 5: Take Photo
Stand at the required location
Open the GPS Camera app
Tap the Camera button
The photo will be saved with GPS details printed on it
🖼️ How to Check Geo-Tagging
Open the photo in Gallery
You will see:
Location text on the photo
OR
Open photo → Details / Info → View location map
📌 Important Tips
✔ Internet helps in getting exact address
✔ GPS should be ON before opening the app
✔ Use the same app every time for official work
✔ Do not edit the photo after capturing (may remove geo data)

%20using%20your%20mobile%20phone%20and%20a%20GPS%20Camera%20app.)